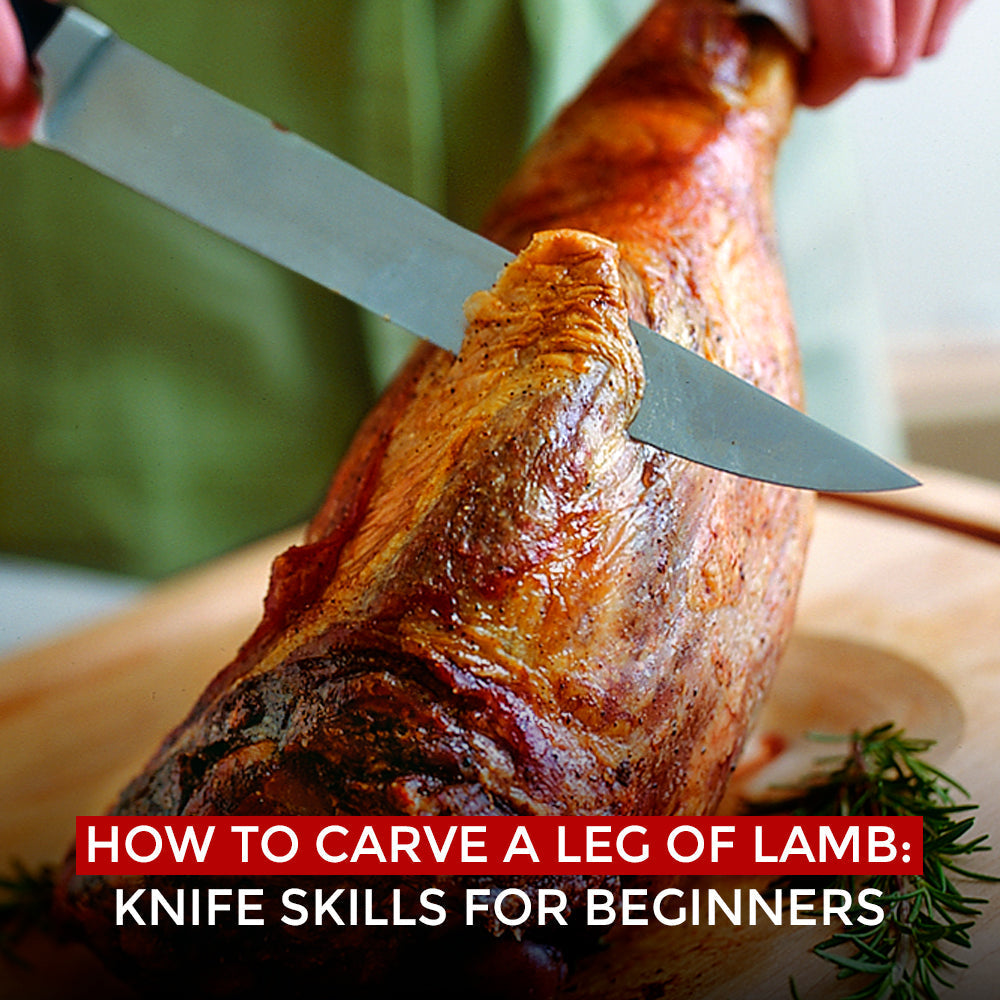
Impress Your Guests: Easy Steps to Carve Leg of Lamb
Serving a beautifully roasted leg of lamb can elevate any dinner party, instantly transforming a meal into a memorable occasion. The rich aroma, tender texture, and striking presentation are undeniable crowd-pleasers. However, for many home cooks, the thought of tackling a bone-in leg of lamb at the carving station can feel intimidating, conjuring images of professional chefs with years of experience. The good news? You don't need a culinary degree to master this skill. Learning
how to carve leg of lamb is a straightforward process that, with a little guidance and the right tools, is entirely achievable in your own kitchen. Prepare to impress your guests with perfectly sliced, succulent lamb every time.
Why Leg of Lamb is Your Next Dinner Party Star
While a rack of lamb certainly makes for a dramatic presentation, the bone-in leg of lamb is a true workhorse, equally accommodating for feeding a crowd and delivering an even more intense, deeply satisfying lamb flavor. Often less expensive than a rack, a leg cut is also generally less fatty and surprisingly easier to cook to perfection. Its robust size makes it an ideal centerpiece for holiday gatherings like Easter or a special Sunday roast, rivaling the grandiosity of a Thanksgiving turkey or an Easter ham.
Choosing a bone-in leg of lamb offers several advantages beyond its cost-effectiveness and capacity to serve many. The bone itself acts as a natural conductor of heat, helping the meat cook more evenly, and it imparts a subtle, savory depth of flavor that is hard to replicate with boneless cuts. Don't let its size or the presence of the bone deter you; the payoff in flavor and the satisfaction of presenting a flawlessly carved roast is immense.
Gearing Up: Essential Tools for Flawless Carving
Before you even think about slicing into your beautifully roasted leg of lamb, ensuring you have the correct equipment is paramount. The right tools not only make the task easier and safer but also contribute to a cleaner, more precise carve and a more elegant presentation.
*
Sharp Carving Knife: This is your most important tool. A long (10-12 inch), sharp, thin-bladed carving knife is ideal. A dull knife will tear the meat, make carving difficult, and can be dangerous. Consider a straight-edged blade for maximum control or a Granton edge (with indentations) to prevent meat from sticking.
*
Sturdy Carving Fork: A two-pronged carving fork is essential for holding the roast steady while you slice. Look for one with a comfortable, non-slip handle and long, sharp tines to securely grip the lamb without damaging the meat. This keeps your hands safe and the roast stable.
*
Robust Cutting Board: Choose a large cutting board, preferably one made of wood or high-density plastic, that can accommodate the entire leg of lamb. A board with a juice groove around the edge is highly recommended to catch any flavorful drippings, preventing a messy countertop. A non-slip base or a damp towel placed underneath the board will ensure stability.
*
Warm Serving Platter: Have a heated serving platter ready to receive the carved slices. Warming the platter slightly will help keep the lamb at an optimal temperature, ensuring each serving is enjoyed at its best.
The Crucial Resting Period
Beyond the tools, the most critical "preparation" step for any roast, especially a leg of lamb, is allowing it to rest properly after cooking. Once you remove the lamb from the oven, loosely tent it with foil and let it rest for at least 15-20 minutes, or even up to 30 minutes for a larger roast. This allows the juices, which have been pushed to the center during cooking, to redistribute throughout the meat. Skipping this step will result in a dry, less flavorful roast with all the juices running onto your cutting board rather than staying within the meat.
Mastering the Cut: Step-by-Step Guide to Carving Leg of Lamb
With your lamb perfectly rested and your tools at the ready, it's time to learn
how to carve leg of lamb like a pro. These steps will guide you through creating beautiful, even slices ready for your guests. You can find more detailed visual guides on
Effortlessly Carve Bone-In Leg of Lamb at Home in 4 Steps.
1.
Position and Initial Parallel Slices
Place the leg of lamb on your cutting board, laying it on its side with the shank bone (the narrower end) pointing away from you. This position will expose one of the thicker, rounded sides of the leg. With your carving fork securing the roast, begin making thin, even slices parallel to the bone. Start from the outer edge and work your way in. The goal here is to create uniform pieces without encountering the bone yet. Once you hit the bone, lift these slices gently with your knife and fork and transfer them to your warm serving platter.
2.
Stabilize and Slice Perpendicularly
Now, turn the leg onto the cut, flat side you just created. This provides a stable base for the roast, preventing it from rocking as you continue carving. With the lamb now sitting level, begin slicing the meat perpendicular to the bone. This means cutting straight down, across the grain of the meat. These slices will be wonderfully uniform and tender. Continue slicing until your knife meets the bone. Aim for slices about 1/4 to 1/2 inch thick, adjusting to your preference.
3.
Following the Bone and Reaching the Shank
Once your knife hits the bone while cutting perpendicularly, adjust your technique. Instead of trying to cut through the bone, angle your knife and continue slicing *along* and *above* the bone. You're essentially following the contour of the bone, separating the larger sections of meat from it. Work your way towards the shank end of the leg. The shank end typically has less meat and may be a bit more done than the central part of the roast. To carve the shank meat, you can often make shorter, parallel cuts directly along the bone, similar to how you started, to free these smaller, flavorful pieces.
4.
Separating and Serving
After you've made several slices along the bone, you'll have a section of meat that is still attached at the base. To fully free these slices, make a long, horizontal cut along the top of the bone, carefully running your knife underneath the carved sections. This will detach the larger pieces of meat from the bone. Lift these freed slices and transfer them to your warm serving platter. Arrange all the slices neatly, overlapping them slightly, for an attractive presentation.
Expert Tips for a Perfect Carving Experience
Beyond the step-by-step process, a few additional tips can significantly enhance your carving experience and the final result. For even more insights on presentation, read
Leg of Lamb Carving: Master the Cut for Perfect Presentation.
*
Always Slice Against the Grain: This is a golden rule for carving any roast. Identifying the grain (the direction of the muscle fibers) and slicing perpendicular to it shortens those fibers, resulting in more tender, easier-to-chew slices. With a leg of lamb, the grain can sometimes change direction, so be mindful as you carve.
*
Maintain Knife Sharpness: A honing steel can be used throughout the carving process to maintain your knife's edge. A few quick strokes before you start and periodically during carving can make a world of difference.
*
Don't Rush: Take your time. Rushing leads to uneven slices and potential accidents. Precision and patience are key to beautiful, consistent cuts.
*
Understand the Bone Structure: Before you start, take a moment to visualize the bone's path within the leg. This awareness will help you anticipate where the bone will be and adjust your knife accordingly.
*
Utilize a Damp Cloth: Placing a damp paper towel or cloth under your cutting board will prevent it from slipping, adding an extra layer of safety and stability.
*
Practice Makes Perfect: Like any skill, carving improves with practice. Don't be discouraged if your first attempt isn't flawless. Each time you carve, you'll gain more confidence and finesse.
Carving a leg of lamb doesn't have to be a daunting task reserved for professional kitchens. With the right tools, a bit of preparation, and these easy-to-follow steps, you can confidently take on this impressive roast. The joy of presenting a perfectly carved leg of lamb to your appreciative guests is a rewarding experience that makes the effort entirely worthwhile. Enjoy the process, savor the delicious results, and watch your reputation as a gracious host soar.